SMS
The SMS Branch is used to establish an automated system to receive and reply to text messages.
Features explained in this article
Command
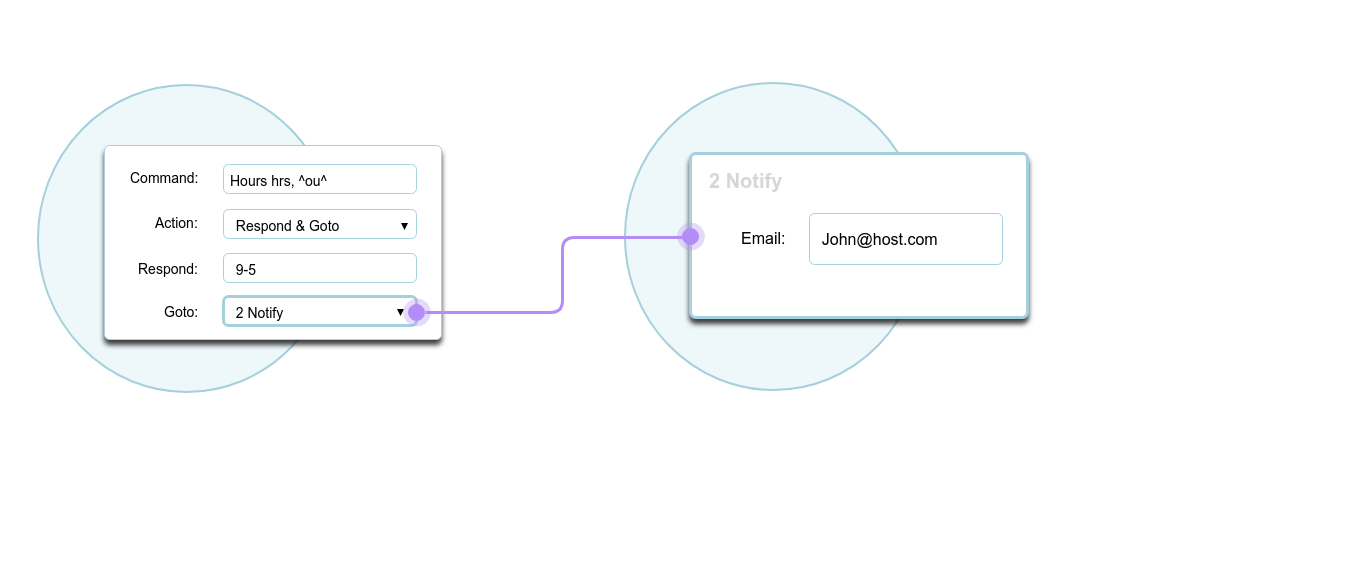
This is where the system is told what commands texted by customers should be recognized, and how it should react.
- Command: Specific words can be entered for the system to recognize as commands (ex. hours). More than one command can be saved to instigate the same action. (ex. Hours, times, etc.) Capital/lowercase letters will not make a difference. If a carat (^) is placed before a command, texts will be recognized even if there are additional letters/words placed before the actual command that was saved in the system. Likewise, if a carat (^) is placed after the command, texts will be recognized even if there are additional letters/words placed after the actual command that was saved in the system. If the command was saved with a carat (^) on each side, texts will be recognized even when there are additional letters/words on either side.
- Action: This will determine what action should be taken once a command is recognized:
- Respond: A response will be sent each time a command is recognized. (This response is entered beneath the action - ex. Thank you for your purchase e.t.c.)
- Goto: This will switch over to another branch once a command is recognized. The system will then follow the instructions of the branch that it switched over to. (The branch that the system should switch over to is selected beneath the action.)
- Respond & Goto: This will send a response to each recognized command and then switch over to another branch. The response and goto branch can be chosen beneath the action.
- Respond & Land: This will send a response to each recognized command and then set the selected branch as the new landing branch for this number. This means that the next time this client will send a text they will land at the new landing branch. (The response and the new landing branch can be set beneath the action.)
- If No Route Found: If the text’s command is not recognized, the action to be taken can be set up:
- Respond: The system will send a response each time a command is not recognized. (This response can be entered beneath the action - ex. Command not recognized.)
- Goto: The system will go to a different branch and continue to follow the directions of that branch each time a command is not recognized. (The branch that the system should switch over to is selected beneath the action.)
- Respond & Goto: The system will send a response each time a command goes unrecognized and then switch over to another branch. The response and goto branch can be chosen beneath the action.
- Respond & Land: This will send a response to each unrecognized command and then set the selected branch as the new landing branch for this number. This means that the next time this client will send a text they will land at the new landing branch. (The response and the new landing branch can be set beneath the action.)
Add Label
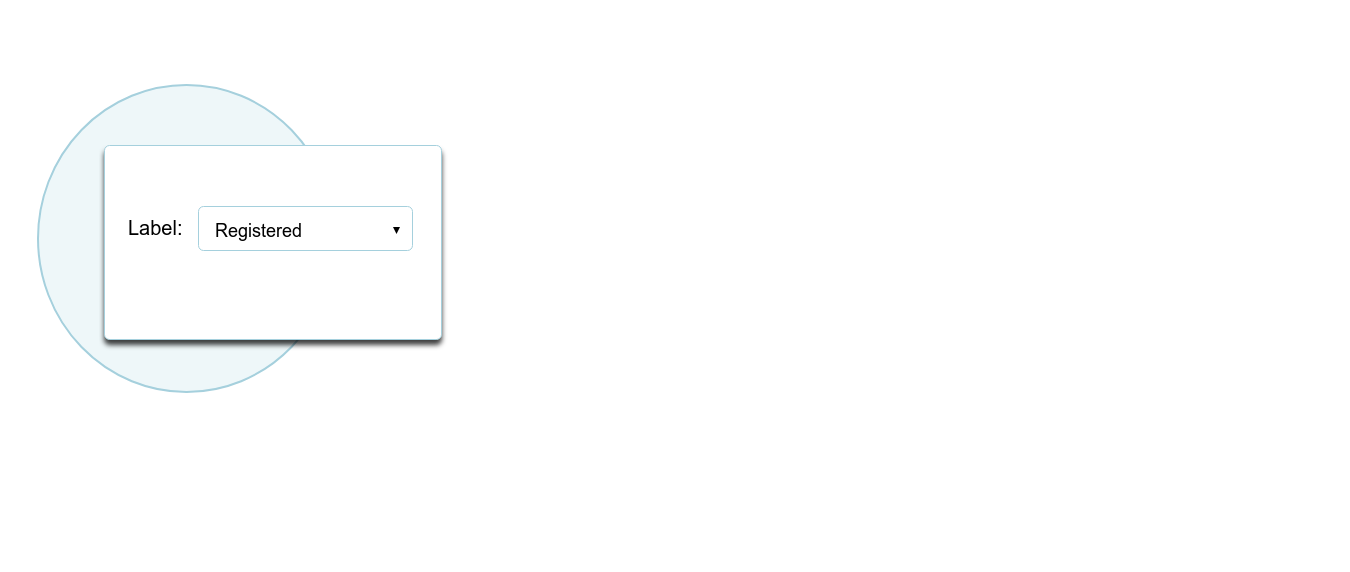
This will put a label onto each contact that passes through this branch. (See Contacts for what a label will do to a contact.)
The label to be added should be entered where it says Label.
API
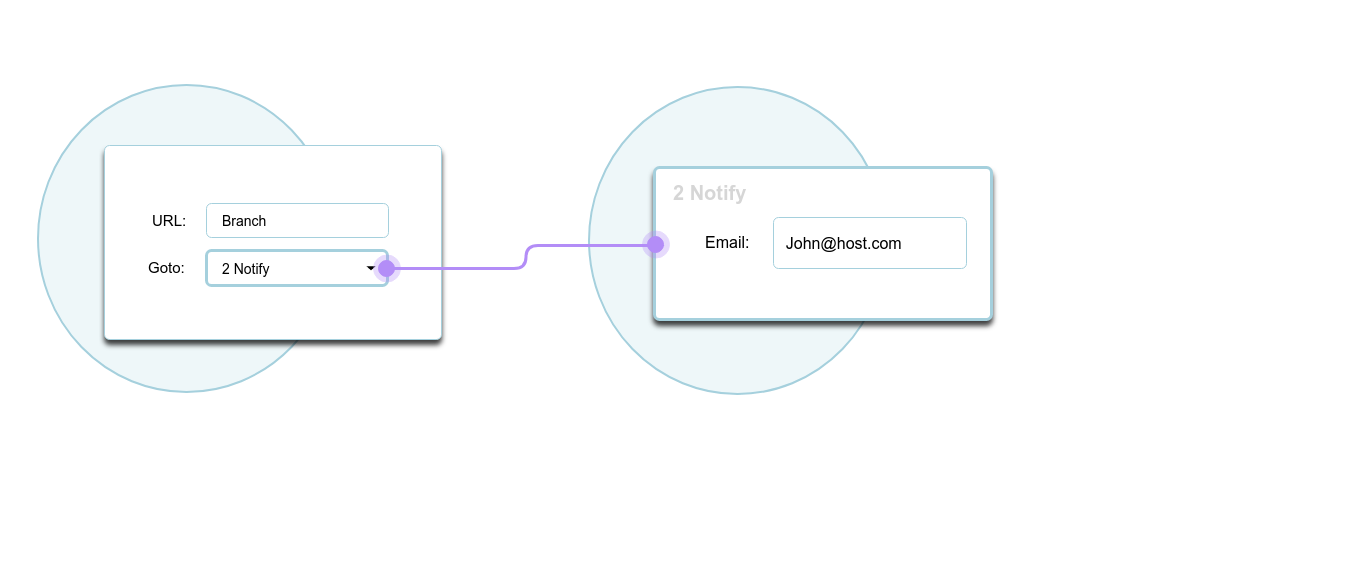
API forms a connection between two programs, where one can request information from the other by sending a URL and automatically receiving a response with the information. Using this feature, customers who request information that is not in our system will be able to receive an answer (e.g. account balance).
Broadcast
This is used to send out mass texts (or calls). (Please note that local numbers will only send between 5-15 texts and will not send the rest. A toll free number is needed for mass texting.)
-
Action: This will determine the action to be taken:
- Respond: The system will send a response. The response can be entered beneath the action.
- Goto: The system will go to the branch entered beneath the action and proceed accordingly.
- Respond & Goto: The system will send a response (entered beneath the action) and then go to the branch entered (and proceed accordingly).
- Respond & Land: The system will send a response and then set the branch entered beneath the action as the landing branch for those who were the recipients of the broadcast (meaning that the next time a text will arrive from any of the broadcast’s recipients, the system will follow the directions of the recorded branch).
-
If No Route Found: This tells the system what to do in the case where no route is found.
- Respond: The system will send a response. The response can be entered beneath the action.
- Goto: The system will go to the branch entered beneath the action and proceed accordingly.
- Respond & Goto: The system will send a response (entered beneath the action) and then go to the branch entered (and proceed accordingly).
- Respond & Land: The system will send a response and then set the branch entered beneath the action as the landing branch for those who were the recipients of the broadcast (meaning that the next time a text will arrive from any of the broadcast’s recipients, the system will follow the directions of the recorded branch).
-
Action: This will determine the action to be taken:
Label
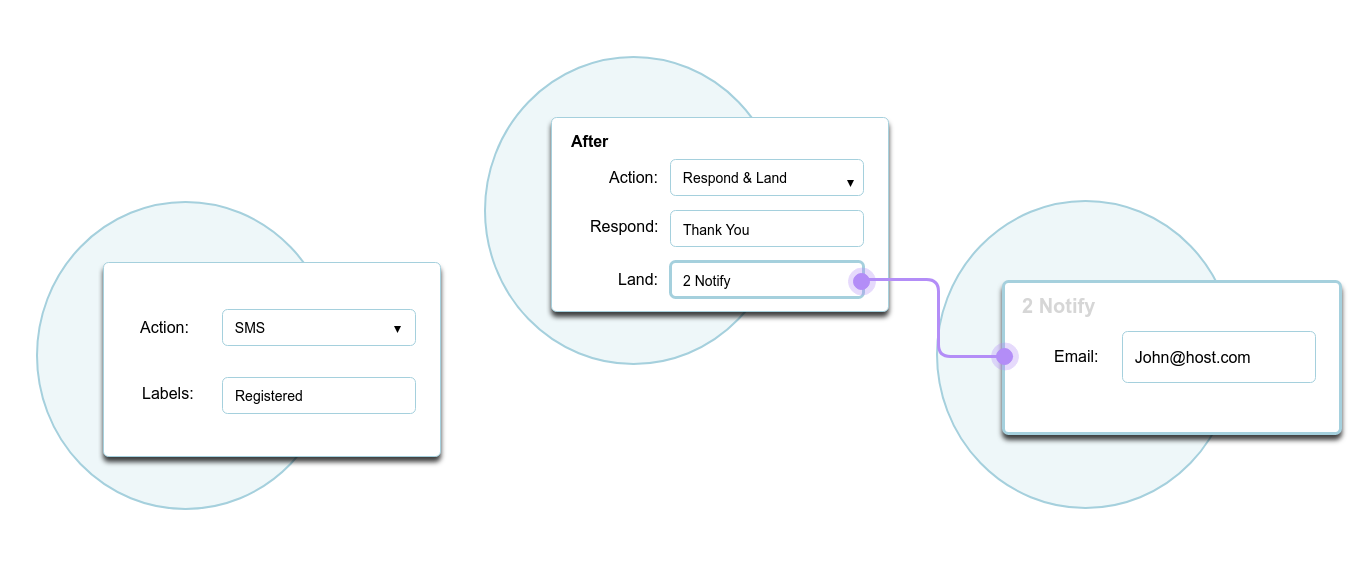
Label: This will only let a number through to the next branch if the number is saved in Contacts under a label.
- Label: The label desired can be entered here.
- Action: This will tell the system what action to take once a label is recognized.
- Goto: The system will automatically switch to the set branch and continue according to the instructions of that branch. The goto branch can be set beneath action.
- Respond: The system will automatically send a response when a label is recognized. The response can be entered beneath action.
- Respond & Goto: The system will both send a response and then switch over to a different branch (and continue according to that branch’s settings) when a label is recognized. The response and goto branch can be set beneath the action.
- If No Route Found: The action to be taken when someone who is not recognized under the label sends a text can be set up here:
- Respond: The system will automatically send a response. The response can be entered beneath the action. (ex. You are not yet registered. Please register and then try again.)
- Goto: The system will switch over to a different branch and continue according to what is set up there. The goto branch can be selected beneath the action. (ex. A registration branch e.t.c.)
- Respond & Goto: The system will send a response and then switch over to another branch and continue according to what is set up there. The response and goto branch can be set up beneath the action. (ex. Please register to gain access - and the system then switches over to a registration branch.)
- Respond & Land: The system will send a response and will set another branch as the new landing branch for this specific contact (the next time this contact will text they will land in that branch). The response and goto branch can be selected beneath the action.
Mask
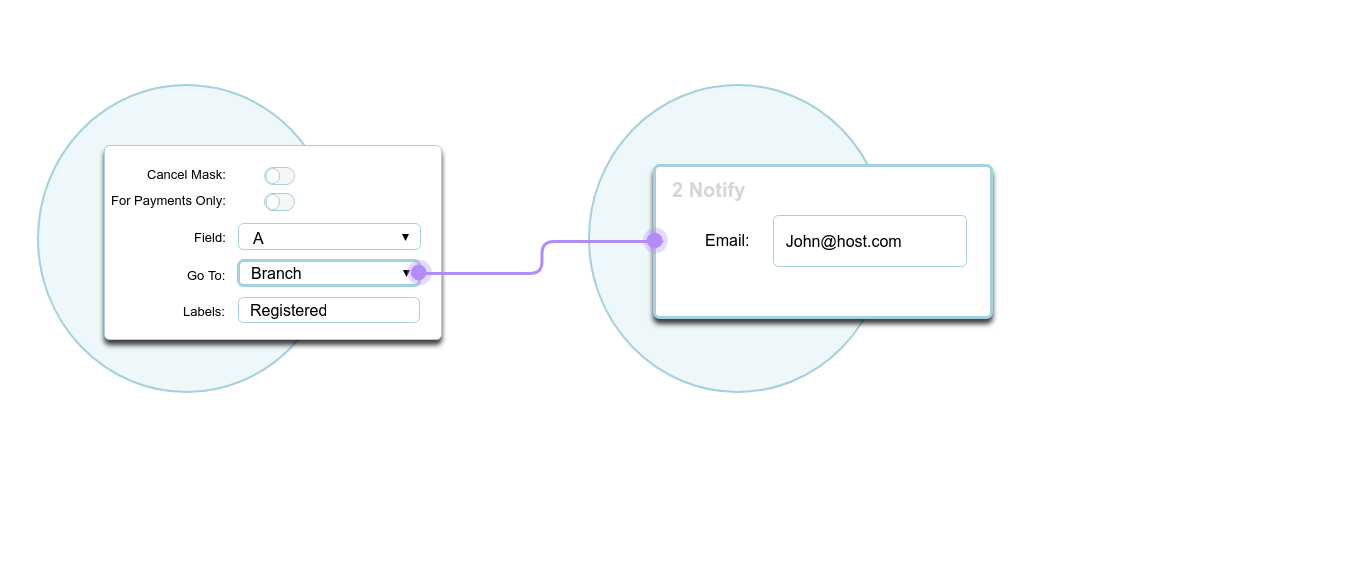
This function is used to allow contacts to go past a branch with a label even when they text from a number that is not saved in the system (if they are already registered under a different number). They will need to enter their contact information manually and the system will then put a mask onto the number they texted from and refer to them as this contact for the duration of this conversation. If desired, the mask can be removed at any point by creating another Mask branch and selecting Cancel Mask. The mask will then be removed as soon as this branch is passed.
- For Payments Only: When selected, the client will be recognized with the mask only when making a payment, meaning that the payment will be registered under the mask contact’s name. The rest of the time the contact will be recognized by the actual number texted from.
- Field:The information to be entered by the contact can be set.
- Phone: This will ask for the contact’s registered phone number.
- A, B, C, D, or E: This will ask for the information entered in the contact’s Field A, B,C,D, or E (whichever is selected). This information can be entered when saving or editing a contact. (More at Contacts>Fields)
- Pin: This will ask for a special pin.
- Go To: The branch to go to once the mask is put on can be selected here.
- Labels: A label can be entered so that only masks under this label will be allowed past this branch. (More on labels: CONTACTS>LABELS / SMS>LABEL)
- If No Route Found: The action to be taken if a client’s entered information is not recognized or if the mask is not found under the entered label can be set here.
- Action: The action to be taken can be set up here:
- Respond: The system will send a response. The response can be entered beneath the action. (ex. Contact not in system)
- Goto: The system will redirect the client to another branch and then continue according to the settings of that branch. The branch to be switched over to can be selected beneath the action.
- Respond & Goto: The system will send a response and then switch over to another branch and continue according to the settings of that branch. The response and the branch to be switched over to can be selected beneath the action.
- Respond & Land: The system will send a response and then set the selected branch as the new landing branch for this number. The new landing branch can be selected beneath the response.
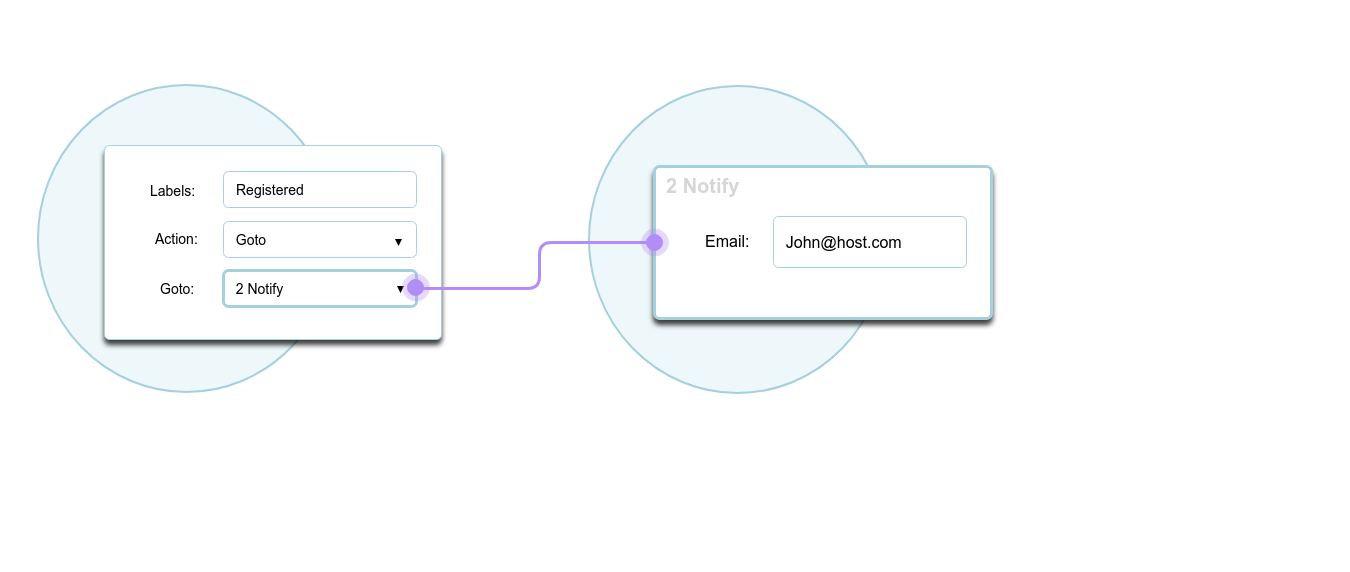
Notify

The system will send an email to the entered email address each time a client passes through this branch.
- If No Route Found:
- Action: The action to be taken can be set up here:
- Respond: The system will send a response. The response can be entered beneath the action.
- Goto: The system will redirect the client to another branch and then continue according to the settings of that branch. The branch to be switched over to can be selected beneath the action.
- Respond & Goto: The system will send a response and then switch over to another branch and continue according to the settings of that branch. The response and the branch to be switched over to can be selected beneath the action.
- Respond & Land: The system will send a response and then set the selected branch as the new landing branch for this number. The new landing branch can be selected beneath the response.
Pay

This will ask for the client's card info and then charge their card.
- The amount to be charged can be entered. If the amount needs to be the clients choice, this slot can be left empty and the client will be asked to enter the amount they would like to pay.
- The amount to be charged can be entered. If the amount needs to be the clients choice, this slot can be left empty and the client will be asked to enter the amount they would like to pay.
- Ask Name: If selected, clients will be asked to send their names before each payment.
- Ask Email Address: If selected, clients will be asked for their email addresses.
- Campaign:
- Merchant: The merchant key needs to be entered so the system will know who to transfer the payments to.
- If Success: The action to be taken once the payment is made can be selected.
- Action: The action to be taken can be set up here:
- Respond: The system will send a response. The response can be entered beneath the action.
- Goto: The system will redirect the client to another branch and then continue according to the settings of that branch. The branch to be switched over to can be selected beneath the action.
- Respond & Goto: The system will send a response and then switch over to another branch and continue according to the settings of that branch. The response and the branch to be switched over to can be selected beneath the action.
- Respond & Land: The system will send a response and then set the selected branch as the new landing branch for this number. The new landing branch can be selected beneath the response.
- If No Route Found: If the payment is not successful the action to be taken can be chosen.
- Action: The action to be taken can be set up here:
- Respond: The system will send a response. The response can be entered beneath the action.
- Goto: The system will redirect the client to another branch and then continue according to the settings of that branch. The branch to be switched over to can be selected beneath the action.
- Respond & Goto: The system will send a response and then switch over to another branch and continue according to the settings of that branch. The response and the branch to be switched over to can be selected beneath the action.
- Respond & Land: The system will send a response and then set the selected branch as the new landing branch for this number. The new landing branch can be selected beneath the response.
Switch Timer
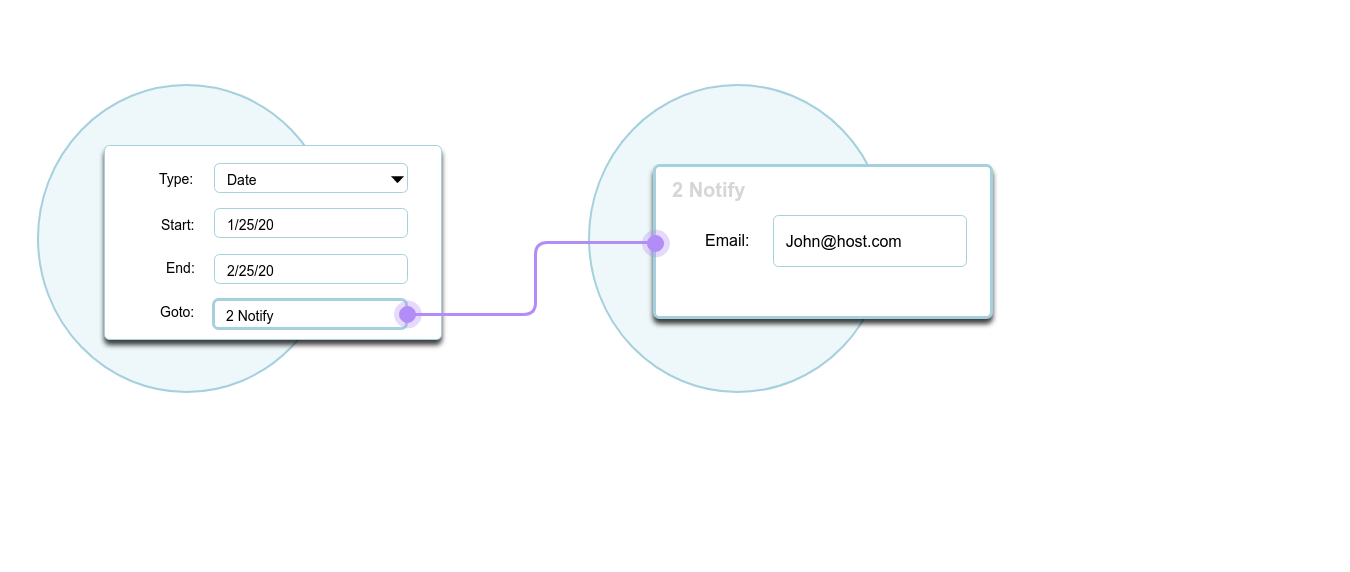
A timer can be set to take the clients to specific branches at specific times.
- Type: The timer can either be set for specific dates or hours.
- Start: The date/hour when the switch timer should start can be entered.
- End: The date/hour when the switch timer should end can be entered.
- Goto: The branch that the system should take the client to when the switch timer is in effect can be selected.
- If No Route Found: The action to be taken when the Switch Timer is not in effect can be chosen:
- Action: This will tell the system what action to take when the Switch Timer is not in effect.
- Respond: The system will send a response. The response can be entered beneath the action.
- Goto: The system will redirect the client to another branch and then continue according to the settings of that branch. The branch to be switched over to can be selected beneath the action.
- Respond & Goto: The system will send a response and then switch over to another branch and continue according to the settings of that branch. The response and the branch to be switched over to can be selected beneath the action.
- Respond & Land: The system will send a response and then set the selected branch as the new landing branch for this number. The new landing branch can be selected beneath the response.
Survey
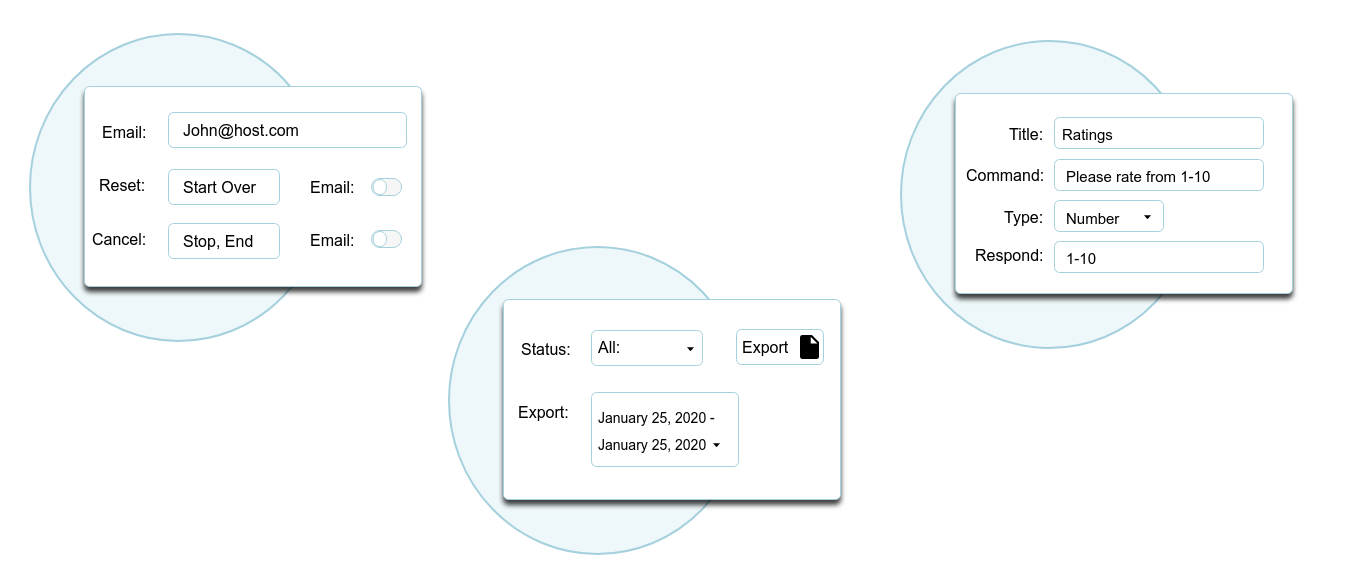
Survey is used to send a list of questions and then receive a notification of the responses.
- Email: The email address for responses to be sent to is entered here. If no email address is entered, emails will be sent to the default email saved in our system.
- Reset: Commands to trigger a reset of the survey can be entered here (ex. Restart, start over…) The system will respond with the response entered in If No Route Found. Select Email if a notification of each reset is desired.
- Cancel: Commands to trigger the cancelation of a survey can be entered (ex. stop,end). The system will respond with the response entered in If No Route Found. Select Email if a notification of each cancelation is desired.
- Status: This tells the system whose survey information to export. Either all, the ones that are finished, the ones that are restarted, or the ones that are cancelled will be exported.
- Export: The information from and till the day entered will be exported.
- Export (on the right): This will export an excel sheet with all the survey information from and till the dates entered.
- Title: This is the title to be referred to later on for each question.
- Command: The question/statement to be sent should be entered here.
- Type: This determines what type of response can be received: either text or numbers.
- Respond: The types of text/numbers to be recognized by the system can be entered:
- Numbers:
- Selection Range: A dash (-) can be entered between digits to show that any number between those will be recognized (ex. 10-250: any amount starting from 10 and up to 250 can be entered).
- Specified Only: A comma (,) can be entered between numbers to show that only the numbers entered will be recognized (ex. 2,15,23,108: only one of these specific numbers will be recognized).
- Digit Count: A number can be entered in parentheses so that any number can be entered as long as it has that specific amount of digits (ex. [20]: any number can be entered as long as it is 20 digits long).
- Exact Digits: If a number is entered with no other characters, only that specific number will be recognized (ex. 33: only the number 33 will be recognized).
- Text:
- If additional slots are desired, Add Slot can be selected.
- If additional slots are desired, Add Slot can be selected.